Thursday, September 17, 2015

This blog is so overdue for an update! Since Jan, we've made some progress, got a new dog, refinanced the house, got window treatments like m'fing ADULTS, had 3 groups of family stay with us, went on vacation and enjoyed the hottest summer on record. So here's a bit of an update on our very slow progress.

We picked ribbon sapele as the veneer on the outside, which looks like this:

Turns out, it wasn't that much more expensive to have them cut out the profile via CNC after doing the custom veneer layup, so this is a preview of the side:
We used that profile and a pattern bit to cut a pattern piece on which we'll do most of the "dirty work":

Then we started framing the walls. You do this by cutting pieces of 1x4" to follow the profile of the pattern. Then you add vertical 1x2 "beams" to support the frame, and frame out any areas which will need support. After the verticals are in, you flush trim the outside of the to the profile of the trailer.

In addition to joining via Kreg, we also splined the edges. Why? It prevents twisting when we cut off the roof. You'll see what I mean later.

We made splines ourself out of a 1/4" piece of birch and a hole cutter bit on the drill press. We then cut those in half and made the spline slots with the router. The wood is only 5/8" thick, so normal biscuit joinery would be too big.

Here's what they look like glued in place:

We then flush trimmed them mostly smooth, so the splines wouldn't get in the way of any vertical members:


I don't have photos yet, but we're in the process of doing the supports of the wall framing!

Transformer Trailer Table PART 3

- I originally wrote this post in January, but did not ever publish it. - so enjoy now!

Turns out our little luan trick and luan scrap from the blanket fort work great for shimming the table top up across middle beams to the height of the side beams ... We've used an entire 16 oz bottle to attach them.


Here's how we attached the top to the frame:
It's really sturdy!!!

I have a hardware problem ...

When we've been too busy to get to work on the trailer, we've been amassing some amazing hardware.

From top to bottom, L to R
1. Porthole from 1954? Chris Craft - will go over window in entry doors.

This is what they looked like:

2. Portholes for trolley top windows - are covers from light fixtures. New, old stock.
These will go similar to where the upper portholes are in this other teardrop:


3: Hinges for entry doors - originally intended for iceboxes, new.

4. Latches for entry doors - marine door latch, new.

5. Galley Cabinet Hinges - new, old stock, Amerock from the 50's:

6. Escucheon for cabinet latch, new.


7. Running and brake lights, old.

8: Drawer handles. Old.


Not pictured:

Chris Craft Button Labels, might use these instead of the oval escutcheons.

8" Torpedo Cleats - handles for barn doors in the back. Old. Debating returning them, as the chrome is more worn than I would like.
By barn doors, this is what I mean (this is not our design - just showing it so you get the idea):

Oval porthole for front wall of teardrop - this isn't the exact one, but it's close.


Still need to get:

Olive knuckle hinges for the back barn doors: Thanks Chris at Builders Hardware for his help!!!


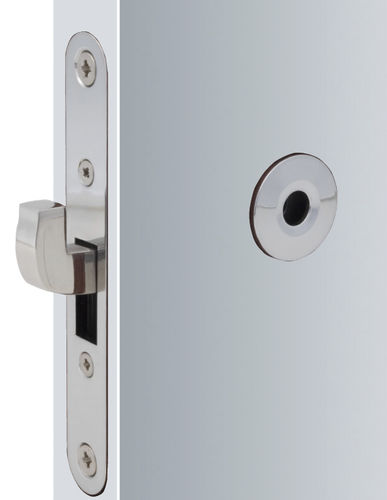
Deadbolt lock, this one is ideal for our thin doors:

Rub strakes for decoration:
And a multitude of other hardware. Including drawer slides, hatch lock/latch for back doors, hurricane hinge for galley hatch, and lots of other fun stuff.