In order to start the build of the side panels, we knew we were going to need a big workbench. We already have two in the garage, but neither of them are big enough to to hold 5' x 10' panels. But you know what would be? The trailer frame itself. So we decided to give it some legs and make it a workbench surface.
But realistically, building a traditional workbench base would be too big for our garage, so I found this REALLY nifty folding workbench on YouTube:
Today we finished FORT KICKASS, our teardrop "concept vehicle" (aka blanket fort).
No blankets were harmed in the making of Fort Kickass. "blanket" is actually craft paper.
Shanna gets a time out for poor planning. Meanwhile the reason for 16" vs 12" on center becomes clear.
Yes, it's a bit rough, and the roof spars are bamboo stakes, but the idea was to see if we needed more interior room with the awesome bed we got.
Swiss Family Cardboard
Pre blanketing (and before a door)
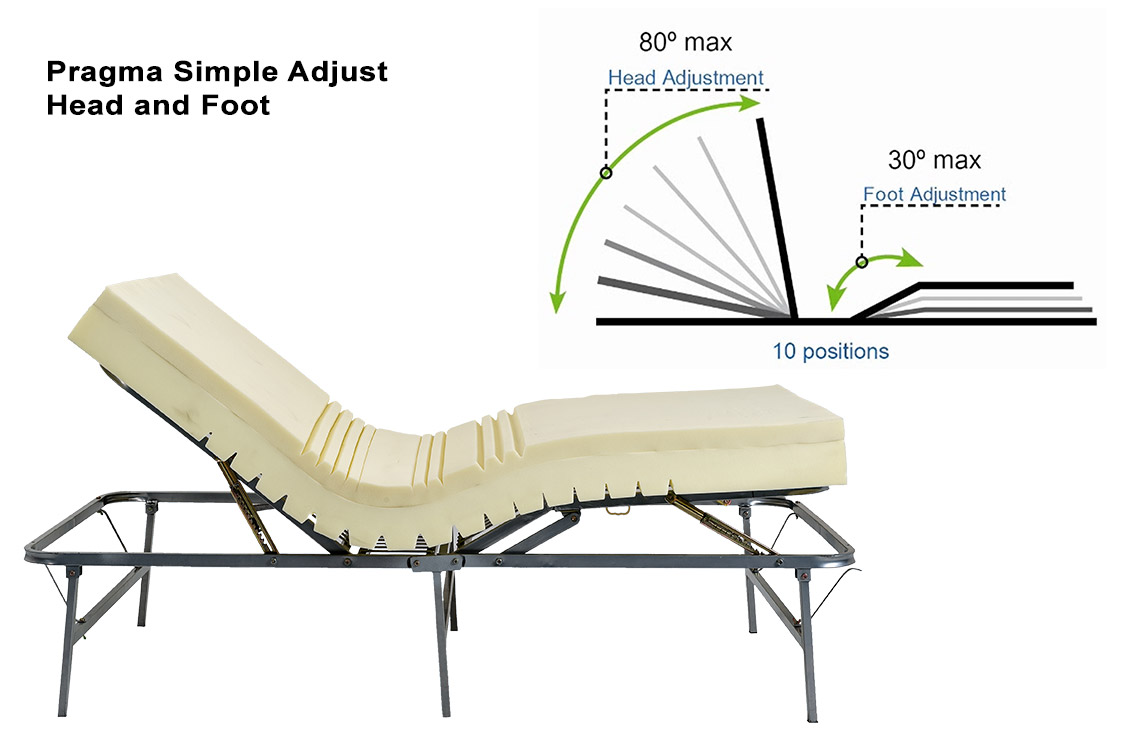
The queen size bed is MANUALLY adjustable on each side--no power needed! We only needed to remove the legs to make it perfect for the teardrop. However, this means we need to be 100% certain the steel frame fits the floor and that the height works for us.
Nifty, eh? And the mattresses are memory foam!
It is SOOOO comfortable and roomy!!!
Even Jason has headroom!
Selfies in the dark
Next step: FORT KICKASS MOVIE NIGHT!!! (that's a tablet stand)
Time to life-size model this puppy. Since we are getting in it, we needed to disassemble the trailer a bit and get it out of the way. Yes, our sewer pipe is gross. (It's a sewer pipe, get over it)
We taped out the floorplan on the floor and tested it for size.
3D modeling only gets you so far, so we decided to build a blanket fort as a mockup for the trailer. But of course, a blanket fort done "Shanna and Jason style" is actually more of a construction project, just done with cardboard, luan, and duct tape.
We've taken a temporary detour, learning electronics basics. The plan is to have the most efficient solar DC system with all kinds of hifalutin' technology.
Ideally we only want one or two AC outlets, and the rest will be DC, including a Bluetooth-steaming audio system and speakers so we can stream music from our phones, power our tablets to play movies, and run the LED lighting with a variety of programs the control when certain lights are on or off and their brightness levels. We've taken two courses: Intro to Electronics and Intro to Arduinos. An Arduino is an open-source microcontroller that is programmed using C++. Here's some good info: http://en.m.wikipedia.org/wiki/Arduino and here's a video introduction:
One of the major applications that a lot of people are using it for is making their own home monitoring systems, including key fob or phone app operated door locks, being able to see security camera video remotely in real-time on your phone or tablet and alarm systems. We'll use it to control our lighting programs, and possibly enable our phones to be remotes for our audio/video system, similar to your TV remote. Cool, huh?
Jason got me a cool kid's electronics kit that we've been getting some of the basics on:
Today we finished our first test project soldering components to a PCB. It's a Photo Sensor that turns on and off with light levels. Below is the video of it in action, and you can see that our dining room is so dark that we'll need to tweak the sensitivity potentiometer, but the nice thing it that you can actually see it in action. We can connect it to lighting (like a nightlight or porch light) to automatically turn them on and off. Here's a short video:
Anyway, you can see how much cool stuff we get to play around with. At first I thought Jason was crazy wanting to do this, but now I'm loving all the stuff I'm learning. And I'm getting all kinds of cool ideas for things to do in the house. I REALLY want to be able to lock the doors to our house from my keychain or phone.